
Marketers that make use of the autoresponders have a lot of their email marketing automated. The Email autoresponders consist of just two individual components that are working together to achieve the primary goal. The first one is the automated email campaign which includes the marketing messages that are sent to subscribers on the list when specific events or actions are triggered. Then we have the automation rules. These are the triggers or the actions the sender puts in place to determine when the particular automated messages are to be sent.
For example, if a business wants to follow-up on their customers who made purchases by cross-selling and upselling. So, what the sender will do is to create a particular message and sets a trigger such as the purchase of a specific product. When a customer buys that particular item, the action is been triggered, and the automated email is then sent the stipulated time set.
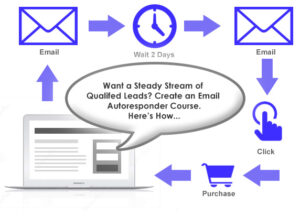
Businesses and websites can now set up their email autoresponders to inform their customers about special offers or any of their new posts, also they can start sending welcome emails or sending gifts to subscribers who have just signed up. One can also make use of them to send other email messages that keep the subscribers engaged. To get started, you will need to register and set up an email autoresponder in the SendPulse.
How to create an email autoresponder series
1. Setting up an event in the Automation 360
2. Create the necessary email templates
3. Connect emails in a sequence
The SendPulse allows you to start creating or to uploading your mailing lists and to also send email sequences to subscribers when they have perform some particular sets of actions. Here is how you can create a custom event-based autoresponder making use of the SendPulse’s Automation 360.
Step 1: Set up an event in the Automation 360
First you need to decide which user action will trigger email sending. Actions like the shopping cart abandonment, the registration, the subscription, the purchase, etc., are called events.
Now go to the “Automations” click on your SendPulse account, open the Event Manager, then choose the type of event, and after that add the generated code to your website.
Step 2: Create the necessary email templates
You need to design your email templates to include in your autoresponder sequence. With the SendPulse, you can do it in 3 different ways:
1. By creating email templates from scratch with a convenient drag and drop editor;
2. By taking templates from the free library and then customizing them to your liking;
3. By using the Chrome extension to save any of your email from your Gmail inbox as a customizable template in your SendPulse account.
Step 3: Connect emails in a sequence
You can start making use of the event you have just created as the starting of your autoresponder. Then, you will have to connect your email templates with the “flow start” element. You can also connect with other of the elements to create the automated flow. You can enter the subject lines and then you schedule the sending time for each of the element in the flow.