This article will walk you through the process of installing and using Google Drive on a Mac. The instructions below are for Macs running OS X Yosemite (10.10) or later.
- How to Install Google Drive
- Google Drive’s Initialization
- How to Use Google Drive on a Mac
- Item in the Google Drive Menu Bar
How to Install Google Drive
If you have not previously installed Google Drive:
- Open a new tab in your browser and navigate to the Google Drive download page.
- Under Backup and Sync, click Download for a personal Drive account.
- Take the time to read and agree to the terms of service. To begin downloading Google Drive for your Mac, click Agree and download.
- Once the download is complete, locate and double-click the downloaded installer. InstallBackupAndSync.dmg is the file name.
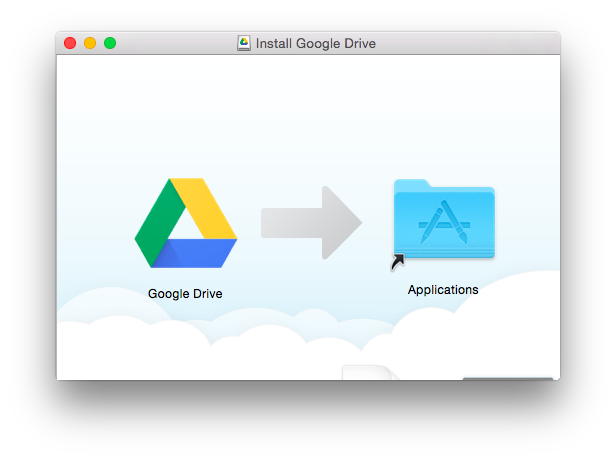
- Click and drag the Backup and Sync from Google icon to the Applications folder from the installer window that opens.
Google Drive’s Initialization
When you first launch Google Drive, you’ll be prompted to complete a few setup steps. Following that, accessing Google Drive is straightforward.
- Open Google Drive or Google Backup and Sync from the /Applications directory.
- Click Open on the warning that appears to remind you that Google Drive is a downloaded application.
- On the Welcome to Backup and Sync window, click Get Started.
- Log in with your Google credentials. Enter your email address and click the Next button if you already have a Google account. Create a Google account if you do not already have one.
- Type your password in the appropriate field and click Sign In.
- When prompted to select folders for continuous Google Drive backup, select GOT IT.
- Select the files to sync and backup to Google Drive and click Next. Consider the additional options and select the ones you want to use. These preferences are modifiable at any time.
- Select Got It to sync My Drive files to a folder on your computer.
- On the following screen, click Start to add a Google Drive folder to your Mac’s home folder.
The installer concludes by adding a menu bar item and creating a folder called Google Drive in your home directory.
How to Use Google Drive on a Mac
Google Drive appears to be another folder on your Mac after installation. It allows you to copy data, organize it with subfolders, and delete items. Any item you add to the Google Drive folder is automatically copied to Google’s cloud storage system, which is accessible from any supported device.
Google Drive comes with 15 GB of free storage, but the space is shared between Google Drive files, Gmail messages and attachments, and Google Photos. This means that your Google Docs, Sheets, Slides, Drawings, Forms, and Jamboard files all contribute to your free 15 GB of storage. If that amount is insufficient, additional space can be purchased through Google One.
Google Drive is well integrated with other Google services, including Google Docs, the cloud-based suite of tools that includes Google Docs, a word processor, Google Sheets, an online spreadsheet, and Google Slides, a cloud-based presentation app. Additionally, it includes an optional backup and sync feature for the files, photos, and other data on your computer that you specify.
Item in the Google Drive Menu Bar
The menu bar item provides quick access to your Mac’s Google Drive folder. Additionally, it contains a link to Google Drive in your browser. It displays recent documents you added or updated and tells you if the syncing to the cloud is complete.
Perhaps more important than the status info and drive links in the Google Drive menu bar item is the access to additional settings.
- Click on the Google Drive menu bar item to open a drop-down menu.
- Click on the vertical ellipsis in the top right corner to display a menu that includes access to help, Google Drive preferences, feedback for Google, and to quit the Google Drive app.
- Click on the Preferences item.
- The Google Drive Preferences window, which features a three-tab interface, opens.
- My Mac: Allows you to specify which Google Drive folders should be synced to the cloud automatically. By default, everything in the folder is synced automatically, but you can specify which folders to sync.
- Google Drive: Disconnects your Google account’s Google Drive folder. When you disconnect from Google Drive, the files in the Google Drive folder on your Mac remain on your Mac but are no longer synced with the online data stored in Google’s cloud. You can re-establish connectivity by logging into your Google account.
- Settings: Allows you to configure network settings and bandwidth management, which is useful if you’re connected to a slow connection or one with data rate limits. Finally, you can configure Google Drive to launch automatically when you log into your Mac, to display file sync status, and to display confirmation messages when deleting shared items from Google Drive. Additionally, the Settings tab is where you can upgrade your storage plan.
In Conclusion
Your Mac now has additional storage in Google’s cloud that you can use however you wish. However, one of the best uses for any cloud-based storage system is to connect it to multiple devices, allowing for easy access to synced files across all of your devices, including Macs, iPads, iPhones, Windows, and Android platforms. Therefore, ensure that you install Google Drive on any device that you own or control.